Image

Hour of Code & Thinglink

Hour of code  hourofcode

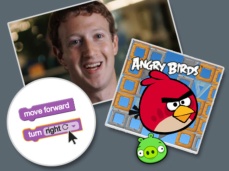
Next week is Computer Science Education Week so It’s time for “Hour of Code” again. If you have time next week and you want to give your students a sampling of what it is like to program, then this is for you. We have done this for the last couple of years and the kids seem to enjoy it. Here is a link to this year’s tutorials.

Star Wars and Minecraft are the two new themes. The Frozen themed activity from last year is also still available. If you are interested in hosting an hour, let Mike know.

Thinglink

The week prior to Thanksgiving all lower school students spent some time in library talking about being thankful for books and/or literacy. The highpoint of the week was definitely the Thinglink created with the thoughts, stories and memories you shared about books for which you are thankful.

Screen Shot 2015-12-01 at 6.38.12 PM

Click the image to see a Thinglink in action

We spend so much time telling kids how important it is to read; instead of “telling”, this activity let our personal history as readers show them the power of books and reading. The strength of this lesson was definitely the stories, but Thinglink provided a great way to display all of the information in a format that gave direction of the class to the students.

Thinglink is easy to use, and a basic account is free for you. An educator account is $35 and that subscription allows you to have students create their own Thinglink projects. To create a Thinglink, you upload a photo you want to use and then add tags which appear as colored circles on the image. What  you link to your “Thing” is up to you. This project just uses images and text, but a great addition would have been to use recordings of each teachers’ voice telling their own story.

For more information you can watch their video introduction or talk to Molly or Mike.


What Tech Am I Using Today: Padlet

I thought it might be fun for me to share with you what I’m using today in my classes, and how. That way, you can not only learn about a cool website, but you can see how it can be used to enhance your lessons.

In a recent #EdTechChat on Twitter, teachers were asked what their favorite Web 2.0 sites were. Listed in the top 30 or so was Padlet, a site that functions a bit like an online whiteboard/bulletin board. A teacher can create a wall, and students can sign in and add postings to it. It could not be easier to use, and allows for a fun way to collaborate and comment. Even better, the comments show up as boxes on the wall, and can be moved and organized. Posts can also be Tweeted, Pinned, Tumbled, and posted on several other forms of social media.

How can a teacher use it? Well, a teacher could post a discussion question and ask students to leave comments for homework. Or, a teacher could create their own “magnetic poetry” and students could rearrange words into poems. It could be a very simple project guide site, with each box containing a photo, file, or link to a helpful website.

I decided to use it today on a whim. My second graders have been learning all about alphabetical order, and as we approach Thanksgiving, we’re reading the book I Know An Old Lady Who Swallowed A Pie by Allison Jackson. In order to tie the two together, I thought it would be fun to have the kids work together to put in alphabetical order all the food the old lady swallowed!

For older kids (3rd or 4th grade), this would be a center where they work independently or in pairs, but for 2nd grade, it seemed like a good idea to work together as a class. That means that I needed a way to move words around on a screen, and Padlet fit the bill perfectly. Its flexibility means that, once all the words from the book have been put in order, we can add our own favorite foods to the list, and alphabetize those as well. The possibilities really are endless.

Want to play with my Padlet wall and put the food in alphabetical order? Give it a try here.


Series: Connected Educator Month

To help you prepare for Connected Educator Month next month, over the next few weeks we’ll be featuring a series by tech director superstar Mike Grant on the many different tools you can use to create a Professional Learning Network (PLN). 

October is Connected Educator Month, so if you are interested in becoming more connected to other educators, I will be sending out links for the next few weeks with tips on doing so.

G+

This week’s link is to a video showing how to set up an account on Google+, and how to connect to others in Google+ communities. It was through my account on Google+ that I learned about Connected Educator Month.

If you join Google+, I am on there and will even “friend” you or as they say on Google+, I will “circle” you.

Go ahead and try it– you might like it.

Mike

Graphite

If you bookmark one site I recommend all year, let this be the one. Seriously.

Graphite

You all know by now how much I rely on CommonSense Media. I use their reviews to help me purchase books, I use their curriculum to teach digital citizenship, and now, I use Graphite. Created in collaboration with the Bill Gates Foundation, CommonSense Media created Graphite to be a resource for teachers who are trying to find the best websites and apps to use in the classroom. It’s visually attractive, and easy to search by subject, grade, price, or platform (app, PC Game, website). The site is like mine, only way, way better! There’s tons of content to explore, including a blog with great ed tech ideas. You can also create “boards,” or collections of apps you use or want to use, and add your own “field notes” based on your experiences.

Pocket

Pocket logo

It feels like the end of a years-long quest. Finally, after trying dozens of tools (LiveBinders, sqworl, Symbaloo, Delicious, Diigo, Scoop.It… the list goes on and on!), I have finally found The One. A tool that organizes my many (MANY) bookmarks, gets them off my bookmarks toolbar and into the Cloud, that comes with an iPhone app to put all my bookmarks in my pocket.

Pocket.

Pocket has everything I was looking for:

  • Interface. For me, a beautiful, simple interface is crucial, because so many bookmarking sites are filled with clutter that overwhelm me.
  • Browser extension. Pocket has a lovely little extension for your browser (I use Chrome) that makes adding a new bookmark as easy as clicking on a tiny pocket button. While many competitors have this same feature, I found that they asked for additional information (title of site, etc) and ran really slowly. With Pocket, clicking the button is all you have to do, and it works in the blink of an eye.
  • Tags. Before, my bookmarks were organized into folders. There are two problems with this system: 1) You can’t search for bookmarks in folders, and 2) Unless you want repeats, a bookmark only lives in one folder at a time. With tags, you can tag a single page with many words, putting it in lots of categories at once. Tags are also searchable, and you use Pocket to pull up all pages that have a particular tag.
  • Accessibility across platforms. Because I use two computers (home and work) plus an iPhone, I need my bookmarks to travel with me. By installing the Pocket app on my phone, I can access it from everywhere.

My Pocket homepage, with tags listed down the right side.

Technically, Pocket is a reader app. Originally called “Read It Later,” it was designed to clip articles, videos, and photos so that you can read them later, when you have time. Once read, you can archive them, or mark them as a favorite. The app is still useful in this way, and if you find yourself frequently coming across articles online, and want to hold onto them for a while, Pocket works beautifully. However, it has the power and flexibility to be used as long-term storage for your favorite recipes, blog posts, kitty videos, lesson plans, educational videos, and much more.

Pocket seems to have a pretty good following, and gets lots of love from tech blogs, so I’m hoping it will stick around for a while. Just in case, I still have a hidden folder with all my bookmarks. For now, though, the search is over!

Pixlr

I don’t know if you’ve noticed, but it seems like every free, easy-to-use image editor has gone under. First, it was Picnick, now Aviary. I think I should stop posting about them, because as soon as I do a writeup, they go away. So let’s all keep our fingers crossed that Pixlr is here to stay!

Pixlr is a simple, web-based photo editor that allows you to add cool filters, frames, and effects to your pictures and photos. Using their free Open Pixlr Express, I was able to turn this familiar photo of Crocker:

Image

into a cool, vintage-looking one (complete with coffee stain):

Image

It’s a pretty fun tool to play around with.

Vocab of the Week: Browser Extensions

Whether you’re using Firefox, Safari, or Chrome, you can add all kinds of programs to your browser to personalize it. Browser extensions (also called add-ons) are small programs or apps that can be installed in your web browser to do all kinds of things, from preventing ads, to taking notes, to adding things to your Amazon wishlist.

Installation is simple, and typically involves going to your browser’s extension store or gallery, finding one you like, and clicking “install.” If you’d like to read more specific instructions on how to install extensions on your specific browser, check out this detailed article from Guiding Tech.

While there are literally thousands of extensions out there, I’m just going to start with one. That’s right, just one. Perhaps I’ll make a regular feature to let you know about more, but to avoid overwhelming you, I’m going to start with something that everyone can use.

A Cleaner Internet has created an add-on that turns busy YouTube pages (with their potential for inappropriate video recommendations and offensive comments) into clean, simple pages showing only the video you want. Once you’ve installed the extension, visiting YouTube will stop looking like this:

and start looking like this:

This is so useful when you’re trying to show an educational video to a classroom of students! Often, when I’ve shown YouTube videos to students, they get distracted by all of the recommended videos on the side of the page, and beg to watch them. Sometimes, there are inappropriate words or images included in the ads, comments, or other videos on the page. This extension solves all of that.

To install the Cleaner Internet extension, just head over to their website and click “Install.” The site will figure out what browser you’re using and download it. This particular extension can also be set up to clean Amazon pages, too, if you’re interested!

Once you get comfortable installing and using extensions, you can find so many more by using Google to search “top 10 best extensions for…” and add on your browser of choice. You’re sure to come up with all kinds of great stuff. And stay tuned for more suggestions!

You Are Your Words

Wow, this is not only cool from a technology standpoint, but can impart a valuable lesson. You Are Your Words is a tool created by the American Heritage Dictionary that turns a student’s words (using a piece of writing that they have already created) into a picture of that student. By uploading a picture, the application manipulates the size, shape, and color of each word until it creates a digital image of the photo. It’s a fantastic way to exhibit student work, and helps students to remember that what they say, what they write, reflects on them.

**Special thanks to iLearn Technology for bringing this great site to my attention.**

Addendum: It has come to my attention (thanks Jen!) that the pictures you create with You Are Your Words are automatically added to their gallery, and can’t be deleted. So make sure you (and your students) are OK with having their creations available for all to see before you go playing with this.